Get an extra boost when you post your Insurance Agency Newsletter on Social Media*.
The set up can be confusing so let us offer you this step-by-step tutorial.
Login to your eNewsletter account the same way you would do to make changes or view your eNewsletter Proof. To the left of the screen, you will see a button that says “Social Media.” This is where you will enter and authorize your accounts.
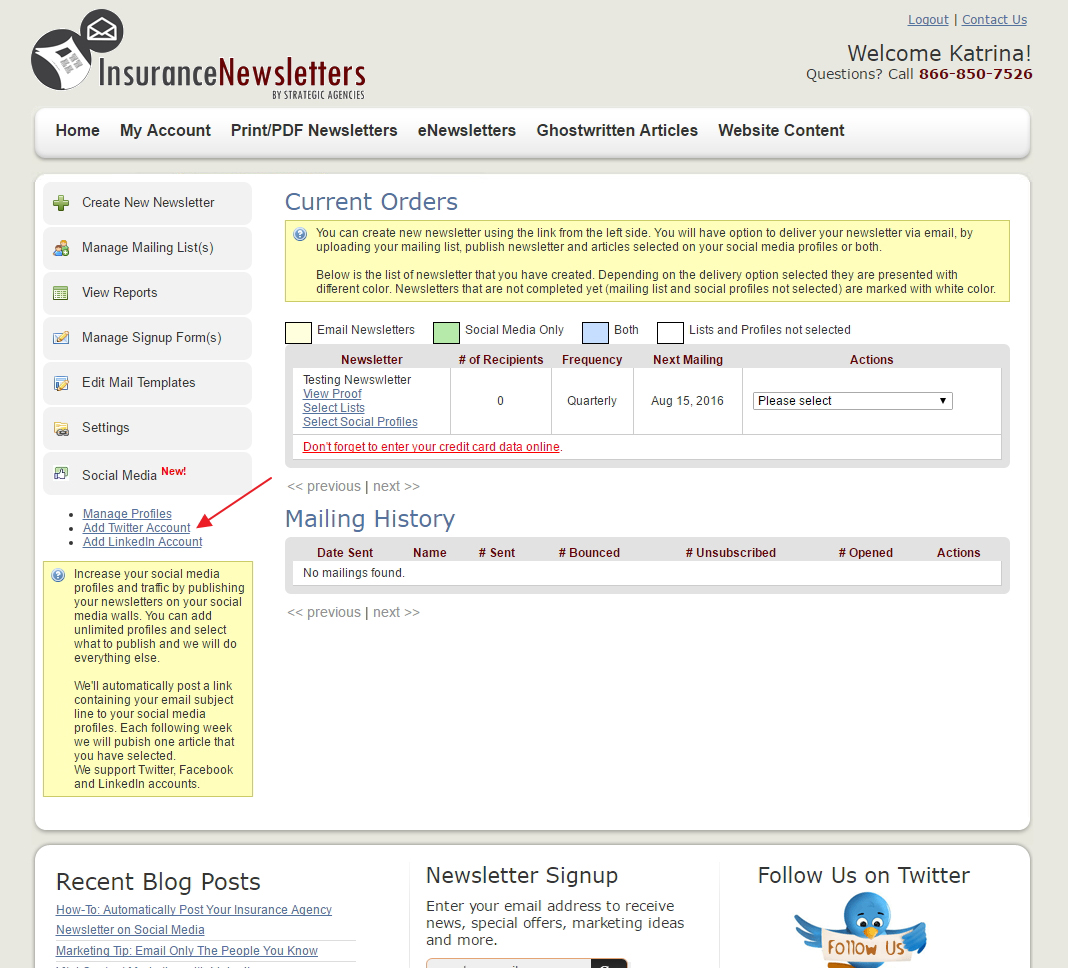
Adding a Twitter Account:
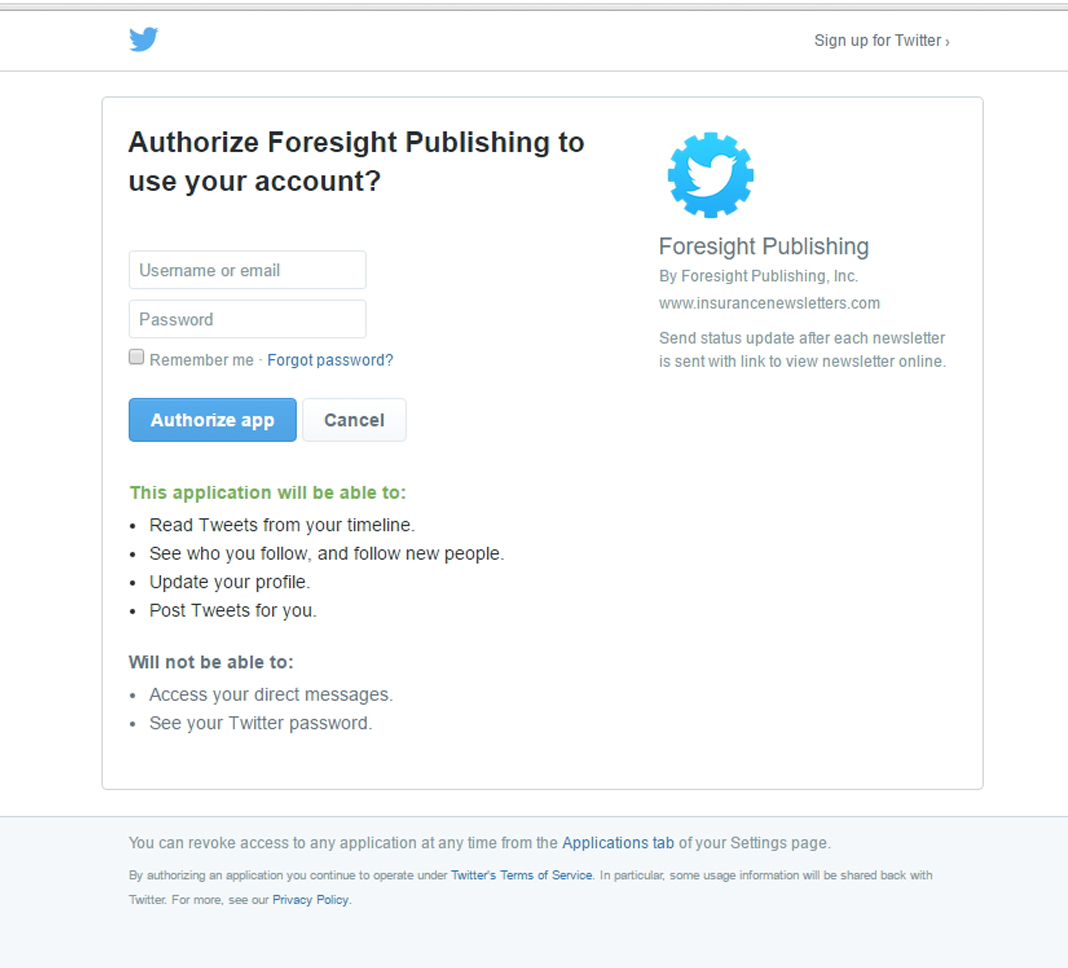
Select “Add Twitter Account.” Enter your twitter username and password, and click “Authorize app.”
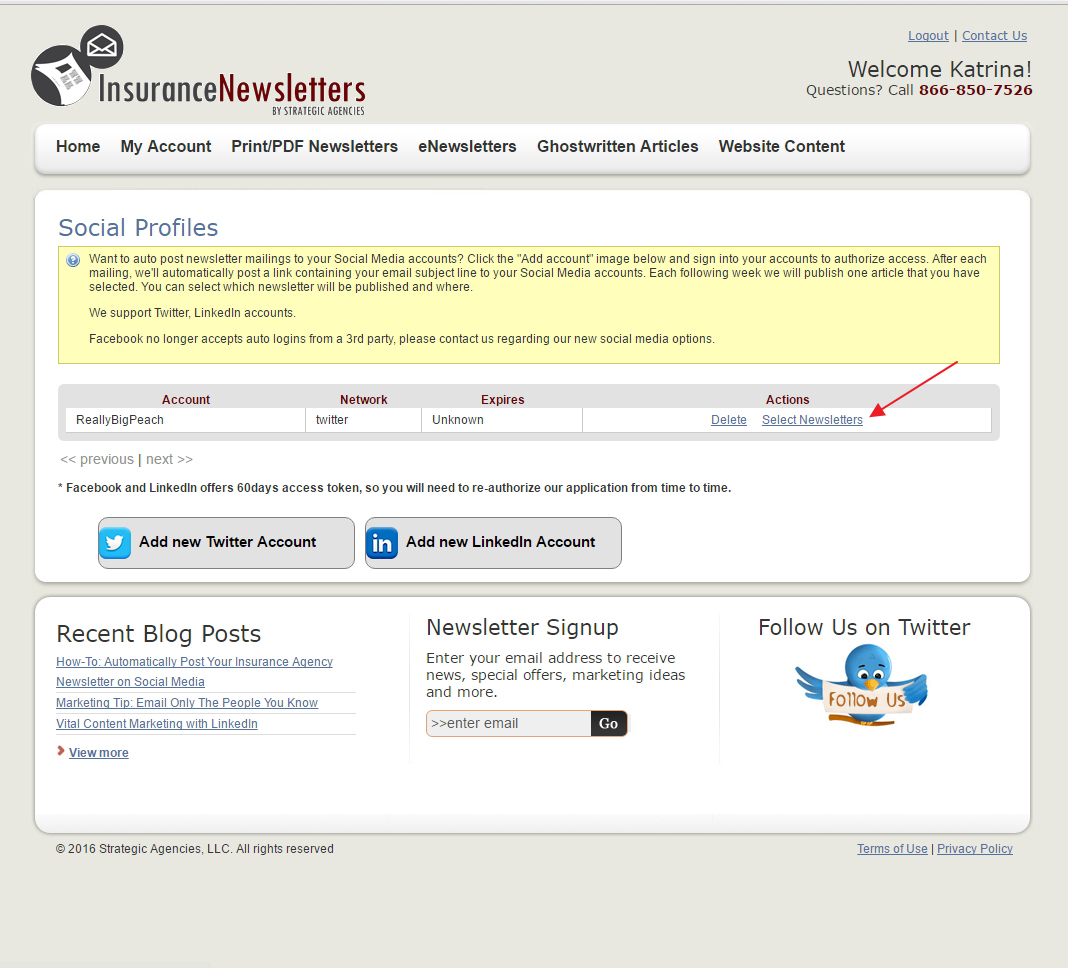
You will be redirected to the “Social Profiles” page.
Adding your LinkedIn Account:
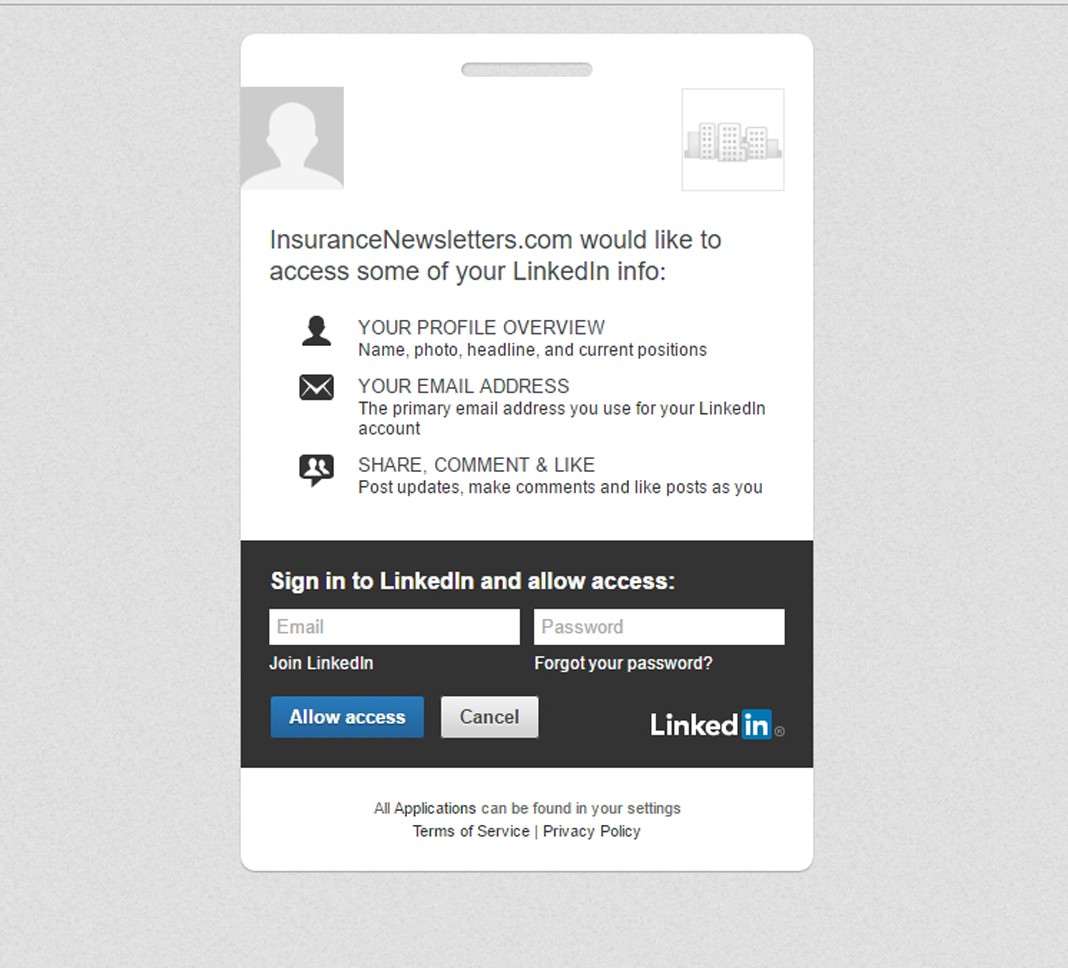
Select “Add LinkedIn Account.” Enter your LinkedIn Username and Password and click “Allow Access.”
You will be redirected to the “Social Profiles” page.
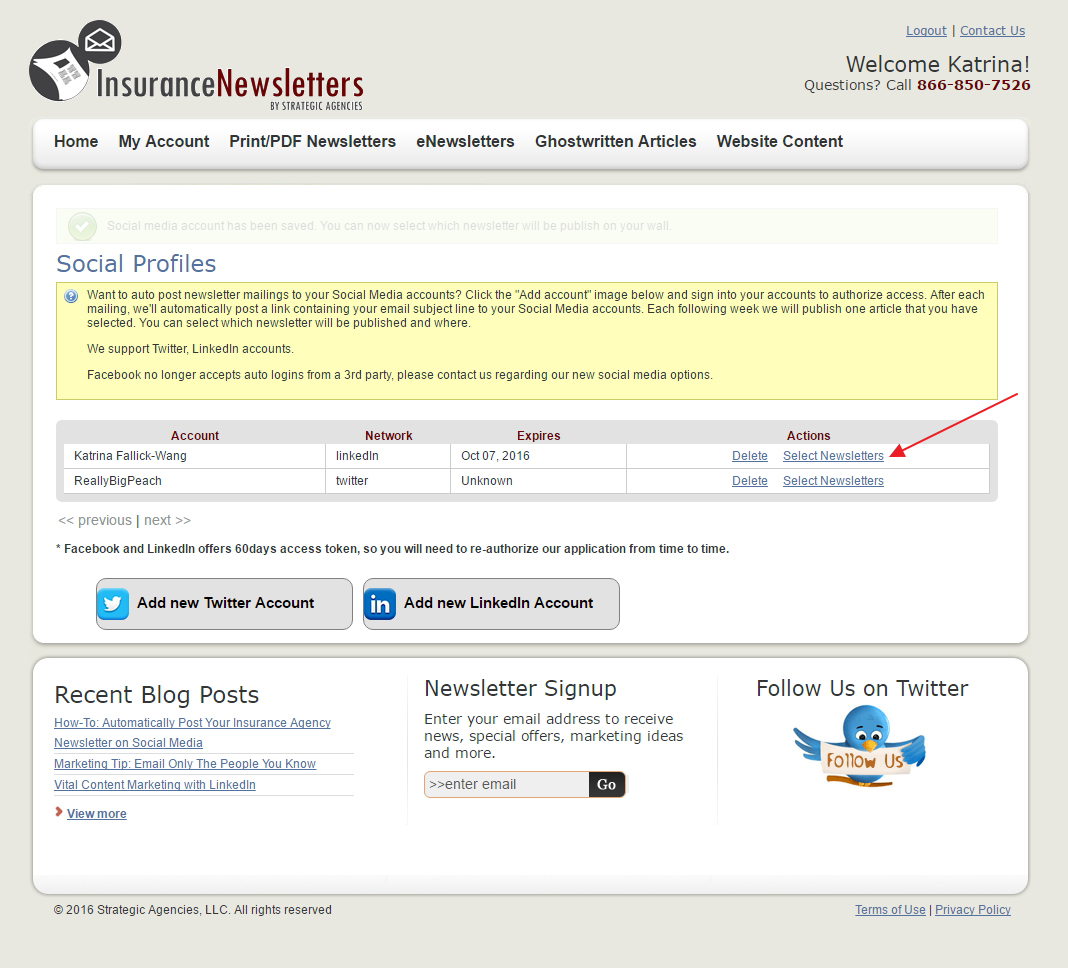
From the Social Profiles page, click the link that says “Select Newsletters.”
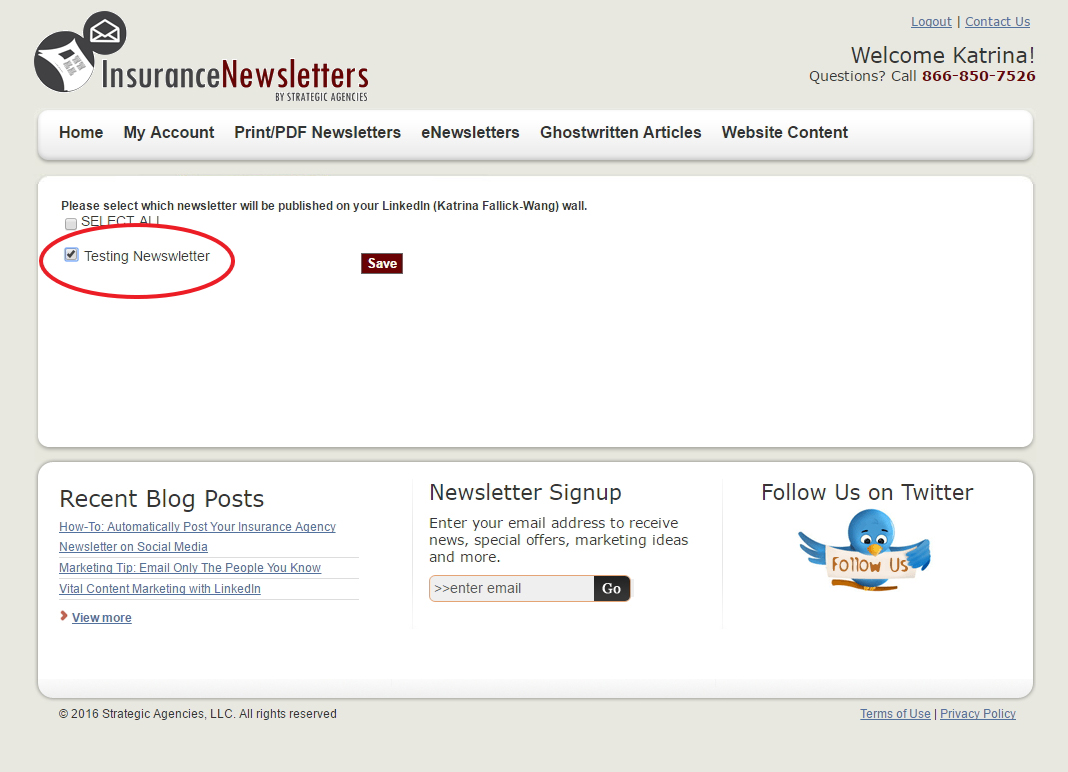
Select which newsletter you want for each social media account. This step is necessary even if you have only one newsletter.
You will know you have successfully added your social media profiles when the box behind your newsletter name displays as green, or blue.
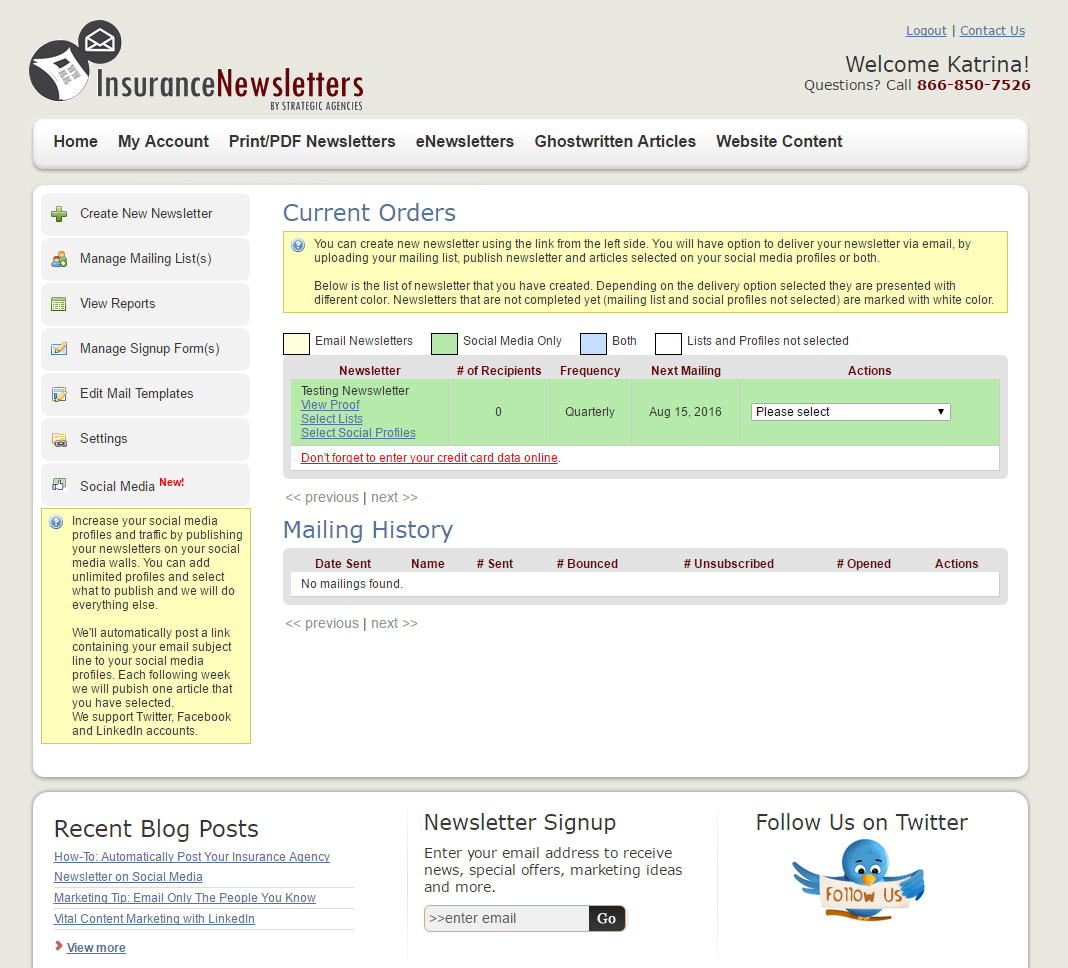
When your eNewsletter goes out, a notification and link will be sent to the social media profiles you’ve selected.
*At this time only LinkedIn and Twitter are included in this feature. There is an additional fee of $10.00 per month for this service. If you require more robust Social Media services including Facebook posting, please contact Katrina Wang for a custom social media quote.
